The lowly laundry basket can be an object of vintage, chic, even French beauty. The metal laundry basket probably is the best at effecting this lovely vintage look, but a cloth-covered, industrial style container on wheels can give the same effect. Here are two options for a French Vintage Inspired Laundry hamper. Both cheap, chic, sturdy, and large enough to hold three or four loads of laundry.
I actually used to use a large basket as a laundry hamper, until the bottom rotted away because of leaving damp clothes in there. I bet that’s why they started making plastic ones. Your average plastic laundry basket does not have vintage, chic beauty. I guess that’ why I used a real basket.
Wire and cloth are more practical. The wire and cloth baskets, or hampers, can give a chic, “I’m going to the laundromat in Paris in the 1960s feeling.” I don’t know if French people going to the laundromat in the 1960s felt chic and stylish, but these types of laundry hampers or baskets are a great way to add some attitude to your laundry room décor.
Here is the video about two practical, big, inexpensive, and très chic options for a French vintage inspired laundry hamper.
If you prefer to read, the transcript follows right below the video.
Transcript
Hey this is Kathleen at oldworldfarmhouse.com and today I wanted to talk about chic French laundry hampers, so let’s go!
I always wanted a laundry hamper like these ones, like when you went to the laundromat, if you went to the laundromat back in the day with the cool wheels and the baskets. So vintage and sweet. There’s just something so, like, urban cool about it. Um, I just love them they’re like, poetic.
So I wanted something like that for my house, and I didn’t want to like, you know, steal one from the laundromat. And I don’t know where they source them from. There’s probably some supplier where you have to buy like a thousand at a time. I don’t know.
It said, you want a laundry hamper that makes you feel like Jean Seberg in 1960s Paris, but you can’t buy one, so you’re going to have to make one. I was hooked. I was like, I want to feel like Jean Seberg in 1960s Paris when I do laundry. So I marched myself out to Lowe’s and I got chicken wire and this little wooden thing and some little wheels on casters and I followed the directions and I have been using this as my laundry hamper ever since.
Vintage Industrial Style Laundry Hamper
Since I made these hampers, I actually made two of them, I’ve always kind of looked around for budget chic industrial laundry hampers. And I never really found anything that I thought was any good, design-wise or price-wise. Until I recently found this cool one by Seville Classics. And it is actually really reasonably priced. And I’ve been watching it for a while, and it was on sale on Overstock for like 60 bucks. No shipping charges. But I’ve seen them often for about that price, and I put it together.
I just wanted to do a quick video and share with you these two really budget-friendly options for a chic 1960s-in- Paris style laundry hamper so you can feel fabulous while you’re doing your laundry. Because I know I like to. I will definitely link out to the Apartment Therapy tutorial they did on this one.
French Vintage Inspired Laundry Hamper Made From Apt. Therapy Tutorial
I just want to show you, um, how it works. So this is from the Army-Navy store. It’s a laundry bag that just lifts. When I take this downstairs to dump it in our laundry I just lift this out, dump the laundry in, and then I bring it back and I put it back into its wire container. You don’t actually want your clothes touching the wire because, you know, they’ll snag. Um, yeah, and then it just kind of rests in there. For a while I had one that had a drawstring top, and that worked really nicely, too, but it wore out finally. And then you can also, I just i pull it around from place to place like that.
I can’t remember exactly how much I spent when I made these. I made two of these back in 2016. If memory serves, I think they each cost about $20 in raw materials from Lowe’s. And then of course buying the liner is going to be an extra expense depending on where you get that. It could be any soft laundry bag.
French Vintage Inspired Laundry Hamper – Industrial Style
And then if you don’t feel like doing all of that DIY leg work, this is the cute little Seville Classics industrial style laundry hamper. it – like I said it was about 60 bucks on Overstock.com I’ve seen it for sale lots of places, including you can buy direct from Seville Classics, which is pretty cool. I just assembled this the other day. I am a completely hopeless klutz when it comes to assembling anything, just ask my husband. I got this together in under 10 minutes. It was super easy, and I love – I am loving it. I love the look of it. The wheels glide nicer, there’s no pokey metal things. So as much as I love my DIY project, I’m also really fond of my Seville Classics.
So there you have it, if you’re looking to feel chic and Parisian when you do your laundry, here are two great budget friendly and super practical options for laundry hampers. They’re also really big and hold a lot of stuff.
I hope you enjoy this and I hope you get some use out of it. Happy folding!
French country style can look totally different depending on which French Country colors you are drawn to.
This post is about a soft French Country color palette of greens, blues, and khakis. Before we get into that, let’s examine the many interpretations of “French Country.”
French country colors could be warm, cool, muted, bright, or soft. They could be a delicious range of cool light blues or a gorgeous array of warm, deep reds.
Or just the reverse – deep warm blues, light cool reds. A French country interior could have layers of bright colors, or soft, muted whites and creams. French country colors are not restricted to a single side of the color wheel.
French Country Farmhouse
French country design and French country décor, can mean rustic elegance, with bright French blue, red gingham checks, and scrubbed, unfinished pinewood.
Country French style could also mean shabby chic, with variegated light greys, whites, and creams, subtly distressed paintwork, toile fabrics in white or light blue or grey.
Delicate crystal and toile is one interpretation of French Country style.Photo by JOHN TOWNER on Unsplash
French Provencal
French country could mean the South of France, evoking the French countryside with the colors of lavender, ocher, terra cotta, and olive, heavily distressed paintwork for a rustic patina, traditional Provencal indiennes cotton calico fabrics sprigged with flowers or cicadas, the symbol of Provence.
There’s so many different ways to take French Country style, so many places to find inspiration, including gorgeous works of fine art.
French Farmhouse/French Provencal Colors
I developed this soft French country color palette from this beautiful painting, “The Balcony” by French artist Edouard Manet. I think it’s a bit of mix of rustic French farmhouse style and French Provencal style . I’m just riffing off of the many beautiful French country styles. I think it’s important to be inspired by, but not slavishly imitate, the beautiful French styles.
The Balcony, Edouard Manet
This palette could be used in a French country bedroom. I think it would be a beautiful palette for a French country kitchen, or maybe even a French country living room or dining room.
In my case, I was simply looking for an interesting paint color, or preferably many French country colors. I’m trying to create a French country home for my family. At the moment I am focusing on bringing French country style into our home by painting furniture. I think painting furniture is the quickest, and most fun, way to add a certain French je ne sais quois to your home.
Here is the video I made about creating this color palette and how to use paint to get an effect like the one on this dresser. If you prefer to read, the transcript follows just below the video.
My jumping off point for this dresser was the painting “The Balcony” by Edouard Manet. I always like to find a piece of art as an inspiration for how I’m going to paint something and in this case it was the balcony i love the different blues and greens and whites and how they all come together in this painting.
I read online that Manet was criticized for this painting, because the colors clashed and didn’t match and didn’t work together. And then, when you look at it, of course, um, it’s just gorgeous. It’s all these blue greens and then there’s these blacks and charcoals and a little bit of white and even some khaki. And it’s just – it is a really unusual and interesting combo of colors, and i think it’s just beautiful. So I had a lot of odds and ends of paint that I wanted to use up, and I liked the idea that it might not all work and it might get criticized at the Paris Salon for, you know, not being quite right, color-wise.
Wax Resist is Perfect for Soft French Country Color Palette
For this dresser I used the same wax resist method that I talk about a lot in the “Ballerinas in Pink” dresser video. I just would paint a color and then go over it with my wax puck, and then paint another color, and then go over with the wax puck, and then paint another and go over, and so on and so on and so on.
Experiment with Joy
I just had a lot of fun experimenting. I wasn’t sure exactly how it was going to turn out, and there were definitely a few moments where I decided it was hideous and I was sorry i had even started. But that is very common when I think you’re doing any DIY there’s always a moment, I think I read that first in Miss Mustard Seed’s book; there’s always a moment with a project where you just want to throw the whole thing in the garbage and you’re convinced it’s hideously ugly.
But just push past that moment, the best is yet – is yet to come. And I’m actually, you know I-I like how it turned out a lot and I i hope you do, too.
Sherwin-Williams Soft French Country Color Palette
Sherwin-Williams Color Palette
And here is a color palette in Sherwin-Williams paints color matched from the Edouard Manet painting “The Balcony.” Sherwin-Williams Cocoon, Cyberspace, Ionian, Grandview, and Patience.
The easiest way to add classic French country décor into your interior design is to use painted furniture. French country furniture is often painted. The French are very comfortable with painting furniture, unless it is a very fine wood. In this post I am going to show you how to paint furniture French country style using a simple wax resist technique.
Where can I find French Country Style Furniture?
You can find French provincial furniture, and good copies of French furniture with very nice faux finishes on them. But I prefer to paint my own. There is a lot of used furniture out there that needs a good home. And there are a lot of furniture pieces with the perfect shapes to look like French country furniture and provincial furniture.
All of that French Provincial furniture from the 1960s with the yellowish, slightly plasticky finish, for example, is in the perfect shapes, often quite good quality, perfect for repainting.
Facebook Marketplace is my go-to place to search for good furniture pieces, but I also love scouring local yard sales, thrift shops, and online and in-person auctions. Auctions just might be the place to score the lowest prices, although if you’re patient and persistent, great deals, I mean steals, are to be had everywhere. There is a lot of used furniture out in the world! HiBid.com is a great place to find online auctions in your local area.
You can easily do your own French country design with the perfect colors for you, at a fraction of the price of buying the real thing, or even good copies. And the furniture piece will be custom finished exactly the way you dream – no settling!
What kind of paint should I use to paint furniture French Country style?
I’ve painted furniture with Annie Sloan chalk paint, (sometimes abbreviated as ASCP) other brands of chalk paint, milk paint, and latex paint. To be honest, while I love Annie Sloan chalk paint, latex paint is my go-to paint. It’s the most inexpensive and easy to get. The range of colors available can be overwhelming at first, but as you paint more often you will naturally develop your own, go-to color palette.
How to Paint Furniture French Country Style Using Wax Resist Technique
This is a tutorial about a favorite technique of mine to paint furniture French Country Style. This technique gives a shabby chic, French country decorating style.
Wax resist means you rub a candle all over your first coat of paint before adding your second. Then, when you paint over that first coat, the paint doesn’t adhere to where you rubbed the candle, creating a subtle, layered look that oozes rustic charm and patina.
You can repeat the wax resist as often as you like, creating layer upon layer of gorgeous textures and highlights.
It’s a perfect technique for classic French country style, or French farmhouse style. In this tutorial I’m using the technique to create a dresser for a French country bedroom. I’m using a muted color palette of light pinks.
I’ve included a supply list of everything you would need to do this project here.
And here is the video I made for you about how to do a wax resist. If you prefer just to read, the transcript follows down below the video.
Transcript
Good Morning! This is Kathleen at oldworldfarmhouse.com and today I’m going to show you how to do a wax resist with paint to get a really awesome finish that looks like you sanded and have tons of layers but you didn’t, you just used wax.
It’s going to be a lovely French Country style girls’ French country bedroom set that I’m working on, so let’s get started.
Fine Art as Inspiration for French Country Style Painted Furniture
I always like to find a piece of art to use as inspiration, like a jumping off point when I start to paint a piece of furniture. In this case I found Edgar Degas’s, “Dancers in Pink.”
The way that their tulle skirts look is my – was my inspiration to do a wax resist with two different shades of pink on these dressers. I like to call these “Dancers in Pink” dressers.
Making Pink Furniture Subtle and Sophisticated, French Country Style
I’ve already painted the drawers with one coat of Sherwin-Williams Azalea Flower. My little girl really wants pink, and I wanted to knock it back and make it a little bit more sophisticated than just pink, even though I know she’d be happy with like, just a plain pink drawer. But Mama would not be, so we’re going to try to do a few lighter coats over a wax resist.
How to do a Wax Resist
So, how to do a wax resist? I’m going to take this – this is a little tea light candle that I popped out of its metal backing and this is easy to hold. It’s just like a little puck, and then I’m going to just rub this very firmly all over each of these drawers and the dresser itself.
I’ll get closer so you can see. I actually do want quite a bit of this pink to show underneath the top coats of paler pink and white that I’m going to put on. I really want a lot of it to peep through, so I am being quite aggressive with my wax, because everywhere that I rub this wax, the next coat of paint is not going to stick.
So I do want it to look layered, but I also want a lot of the pink to show, because my little girl does really love this color. I want this piece look like French country style furniture. It will also be very shabby chic, because of the delicate pink and white I’m using.
I’m hoping this is something that she’ll like for a long time. And then maybe when she’s a teenager she’ll want to ask for an update, and maybe by then she’ll be painting her own! Okay, so I have waxed all of these with my little candle, and I’m just going to brush – brush them off quickly with a rag because some wax crumbs from the candle inevitably gets stuck.
Mixing a Custom Paint Color
Now I’m going to mix my top coat, which is going to be a custom blend of Sherwin-Williams Azalea Flower in this Super Paint here, and it’s in a satin. And then this Sherwin-Williams Pure White in their Cashmere line, which is in a flat.
And I just want to say these two paints that I’m using are pretty much purely accidental. We had a friend who didn’t like this gallon of pink she ordered, and so she passed it on to me. And my little girl happened to want pink furniture and I said, “well this is the pink we’re using because I have a whole gallon of it.”
But I wanted to cut it with white, and so I went in and I just wanted their Pure White in the cheapest line, but they didn’t have it available because of the raw material shortages that are happening everywhere right now – or actually I don’t know if it’s that or – I can’t – yeah, something about material shortages.
So they had to give it to me in Cashmere, which is a higher end line of Sherwin-Williams. But anyway, the main thing is, the colors are Pure White and Azalea Flower. So I’m going to take a paper plate, here it is, and I am going to mix these by starting with the white.
Using Just a Paper Plate, Stir Stick, and My Eyes
So I’m just going to pour a little bit of white onto – or a lot – of white onto my plate. It’s a bit messy, big gallons of paint, here wipe my finger off. I’m gonna pour that onto my plate. So I have a – I have like, a full plate. These are the lunch size plates.
And then I’m going to take the pink and with my stir stick I am going to start mixing it in until i get a color that I like. My inspiration for this lighter pink that I want on top is from the Farrow &Ball color Middleton Pink, which yes, I think is named after our Duchess Catherine.
I’m just going to mix it until I like the hue. I’m just going to dip my stir stick in my gallon of paint again. I realize I’m going to get a little bit of white in there by doing that, but that’s okay. So this is just, like, another dip. And now I’m gonna stir this.
I’m not measuring in any way, I am just eyeballing the color until I get something that I enjoy looking at. That is the only criteria. I have a vision.
Okay, this is getting better. It’s starting to look blushy. I’m going to add this – this is actually just about perfect, but I am going to go ahead and scoop just one more – one more scoop with my stir stick from my gallon of pink and I think this should do it.
So I’m gonna mix until all of the – and again, it takes a while. I’m not sure if it’s because they’re two different types of paint or what, but it takes a while to blend in all the swirlies before they finally go away. I actually – I’m gonna do one more stir stick’s full into here. So that’s four, if you were counting. I dipped my stir stick four times and got a glob of paint, of the pink. And I’ve mixed it into a full plate, a full lunch size Walmart paper plate of white paint.
Okay I think this is gonna do it. I think this is pink enough to get away from the white. From – from the – even the impression that it’s white, which is what I wanted to get away from.
You Don’t Have to Custom Mix
And you could do this with any colors that you wanted to get a custom mix. Or, you don’t have to mix paint. If you had, you know, if you want to do a wax resist with two paints you already have, of course that would work just fine.
Painting the Top Coat Over the Wax
I’m gonna take my trusty Purdy two inch angled brush and I am going to put the top coat on. Kind of the the fun mystery reveal because, you know, you don’t remember, or you can’t really see exactly where you rubbed in all of that candle wax.
Painting Over Metal Handles
And just a quick note on these handles. A lot of times I will take hardware off when I paint, but when it’s metal, I often don’t because I really like the way that metal looks painted and then just rubbed back. So I’ll paint this, but then when I go to finish it, I’ll rub some of that paint off. I like the look of hardware that’s been painted and rubbed back a little bit and then waxed. I think it looks really nice.
Wax Resist is Subtle
When you are rubbing your candle on your piece to do the resist don’t be shy, because the paint is pretty assertive and it will go over even some of the places that you thought you waxed. It’s quite subtle actually, um, which is what I love about it.
I don’t like things that have that look of being very heavily or deliberately distressed, like something that you’d find at Hobby Lobby or something with this sort of factory distressed finish on it. I’m trying to do something a little more subtle than that. Sometimes it ends up looking like that, and I do like that look, don’t get me wrong. It’s very pretty, it’s just then it looks like you bought it.
Okay here is my first drawer finished with the wax resist. You can see where it just wouldn’t go over that, and then just compare that to – so here it is with the one coat of Azalea flower and then here it is with my custom mix over top.
Finishing With Paste Wax
Okay and then when you’re done with the painting, I like to go over my paint jobs with Minwax Paste Finishing Wax and I have this Waxwell brush. You can use just a rag if you don’t have a fancy wax brush. So yeah, you just take your brush and you push that wax brush or rag and you just push the wax gently but firmly into the paint. Don’t be afraid of really pushing it into the paint strokes.
After it’s dried a bit I take a soft cotton rag and I just buff it. If there’s any orange wax I rub it away and I just buff it to a soft, hand rubbed, beautiful sheen. You can see that coming up. I’m a sucker for that. I just think that is the prettiest thing on furniture.
French Country Girls’ Bedroom Furniture
Here is the finished dresser. Edgar Degas’s “Ballerinas in Pink” inspired wax resist two-tone dresser for my little girls’ room. The base coat is Azalea Flower and the top coat is a custom mix of Azalea Flower and Pure White. All paints are by Sherwin-Williams. I think it looks like a tutu. Makes me wanna go dancing right now!
Gold painted picture frames add beauty for pennies. Chalk paint, spray paint, acrylic paint, latex paint, craft paint, even milk paint or genuine gold leaf can work beautifully over inexpensive frames from the dollar store, Walmart, yard sales, or Goodwill. I love to paint picture frames because it’s a quick and easy way to add interest to a room. Painting an old frame is a perfect way to start that gallery wall you’ve been dreaming of. Start with one painted frame and add on as you find more, or go out to your thrift store or dollar store and buy all the frames you want to fill up a wall, and paint them all at once. If you’re lucky, you might find some charming antique frames and thrift stores or yard sales. If you’re not so lucky, metallic paint can do a great job. Paint will stick to an old wooden frame easily. It will work great over metal frames, too. But don’t pass up plastic frames. Paint can turn blah plastic into a beautiful frame.
I wanted some gold painted frames for my new cozy English style library. I had some old artwork in the form of posters, but posters were not going to fit my home décor vision.
Here is the video I made for you about turning cheap plastic frames into gold. If you prefer to read, I put the transcript right after the video down below. I added a supply list, too, for easy reference.
Supply List
For this decor project, you will need:
For this decor project, you will need: A picture frame. Or picture frames. I used these from Walmart:
I wanted this room to look like that picture of Calke Abbey, this one here where there’s these big beautiful oil paintings and gorgeous antique gold frames. Only problem is, I don’t have big oil paintings and I don’t have gold painted frames. So what to do? Can I turn these super cheap frames from Walmart into something that will look like a million bucks in my new English country house library?
Hey, this is Kathleen from oldworldfarmhouse.com and today I am going to try to make the cheapest frames I could find at Walmart into something that looks like a beautiful, aged gold frame for my new library. So let’s get started.
Prepping the frames for gold paint
These are a little different from other frames you you you work these corners until the glass pops out. Okay yeah, okay perfect, so yeah you just you go around each corner and you just kind of push and then your glass comes out.
And it’s got a little cardboard back. I’m going to paint over my little uh, glass front frame. I’m gonna get the edge and then actually I am also gonna paint the side. When you are painting these kind of frames make sure that you paint on that edge and then also on the inside because just a little bit of this inside vertical side does show when you put your picture and glass in. I found that out the hard way by putting in my picture and glass and seeing that there was a little black line, so I had to take it all out – and it was a big mess – and go back over it.
Oka,y my 20 by 30 frame. I already went ahead and put the poster in there that I wanted in there because the plastic doesn’t seem to detach from the black frame. And I just didn’t want to, I tried to pop it out and it didn’t seem to want to go, and I didn’t want to run the risk of cracking it. And if I get any paint splatters I’ll just, you know, scrape them off. Or wipe them off with a bit of paper towel.
I am going to take a little sanding block and just kind of go over this super shiny plastic because i think that might help it grip a little better.
Basecoat is essential for metallic paint
So the first thing I’m doing is painting the base coat driftwood semi-gloss, which is what you’re supposed to paint as the base coat to the Valspar Brilliant Metals Aged Brass. And it’s going okay on this super shiny plastic. It’s – it’s covering about as well as I would expect. Okay, so here is the frame after two coats of the Driftwood color base coat. It has stuck to the plastic pretty well. You can still see some of the black plastic frame shining through, but it’s nothing that I’m worried enough about to go over it a third time. Pretty – it was easy – I didn’t get any drips on my plastic, I mean my glass. I just used this, I think it’s a two inch Purdy angled brush, and I was able to stay on that edge and avoid getting on the plastic altogether, which is nice, but i had a rag here just in case. This is how it looks after one coat of the driftwood base coat. It sticks better to this plastic because it’s not as shiny as that other plastic and I don’t – I’m not even going to go over it a second time. This will be good enough. I’m trying to use just the corner of my brush so i don’t get the plastic. The laziest picture frame painting, just wanted to do a quick project. But no, seriously I think on these poster frames the plastic’s not even meant to pop out, you know, they’re just, they’re very, very inexpensive. This one was six or seven dollars.
Gold Painted Frames
And here are the finished products. Here’s the fatter frame with the – that was that shiny plastic and now it’s gold, not too shabby.
Of course it’s the same paint as I used up there on the trim, and again here’s the two Bruegel posters with their faux metal frames. The narrow little gold around the edge. I think they look pretty good.
We were featured on ApartmentGuide’s Scandinavian Interior Design article. Check out the blog article here!
What is Swedish Country Style?
Swedish Country Interiors have a distinct look. They are Gustavian style simplified. The Swedish interior is a Scandinavian style that works well for casual, hi / low decorating. It is a farmhouse style with a color palette of delicate blues and greens, reds, whites, and greys, clean lines, and Gustavian furniture.
I find Swedish interior design for country living and country houses to be some of the most beautiful and inspirational. I wanted to share ideas with you from three Swedish interior design experts. First, Carl Larsson, the painter, and his wife, Karin. Karin was also an artist. Together they designed an iconic family home. Second, Carol Glasser, an interior designer whose take on Swedish Country house design, and decor, will give you inspiration for a lifetime of decorating.
Here is the video I made for you about getting Swedish Country Style into your home. If you prefer to read, the transcript follows right after the video.
So I thought what I’d do is take two really inspirational people that have wonderful ideas that you could incorporate for Swedish Country Style. I wanted to show you the paintings of Carl Larsson and the interior design of Carol Glasser. These are two artists who really inspire me and I think they have a lot of amazing ideas for Swedish Country Style. So Carl Larsson first.
Two Icons of Swedish Country Style: Karin & Carl Larsson
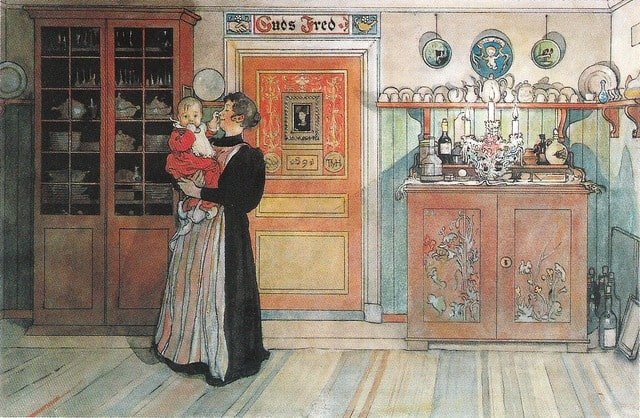
Carl Larson was a Swedish painter and he lived in the late 1800s and he and his wife Karin – Karin was also an artist – and in 1888 they got a home. I think Karin’s dad gave it to them and it was a country house in Sweden. They had six or seven children and they lived in this house and they decorated it themselves in a very beautiful and artistic way and incorporating traditional Swedish style along with anything else that they found artistically interesting.
And Carl painted his family and his wife and the interiors of their home and he left tons of these paintings and they are a trove of ideas for Swedish Country Style. So I wanted to show you some of those and pull out the elements that make it so Swedish, and things that we can take and do in our house, and then all of a sudden you’re like, wow, Swedish Country Style in my house!
Swedish Country Interiors: Carol Glasser
And then also, intermixed with these Carl Larsson paintings, I want to show you some of the work of Carol Glasser.
Carol Glasser is an interior designer based in Houston, Texas. I find everything that I have ever seen her do to be the utmost in perfection. She seems to love the European country style. I’ve seen a lot of her French Country Style work via Joni Webb’s blog, Cote de Texas. I’ll link in the description below. Joni has three or four really great articles about Carol Glasser. I’ve linked them here:
And then Carol was gracious enough to give me permission to use some of the photographs from her website so that I can show you her Swedish Country Style. I wish that she had a book so I could look at it every day. I think everything she does is brilliant and if you are in love with French Country Style, Scandinavian Country Style, European Country Style generally, she is the interior designer for you.
13 Ways to the Get Swedish Country Style Look
13 elements that you could put one or all 13 into your home and add some Swedish Country Style.
Swedish Country Fabric
The first one is fabric. Checked fabric, striped fabric instantly give a Swedish look. tTere’s this, um, you can do any color of checks, like these gorgeous red and white ones here on this armchair in Carol Glasser’s home.
Here, though, you see yellow stripes, as well, so really any color. Here’s some more pictures of Carl Larsson’s house. These beautiful chairs covered with these little slip covers, some red stripes and red checks from Carol Glasser.
Okay the second thing is the sofa or the settee. Get a sofa or sette with wooden carved legs that you can see and a very simple clean silhouette on top, just kind of like a straight line across.
Paint them white, paint them warm gray, and then, you know, cover the seat with a chair cover and checks. I have a tutorial on my blog about a tie on chair cover I am the worst most beginning sewer and I could do this project so you could too. Dining chairs all wooden, painted or not painted. This is one of the Swedish Royal Family’s historic palaces, Stromsholm. Note the beautiful weathered wood on the chairs.
And here is the drawing room of the Crown Prince’s bedchamber at Stromsholm Palace. It looks like the same type of chairs from the ballroom, above, but this time, painted yellow with gorgeous teal green upholstery.
Instead of a coffee table that is low kind of even or lower than your couch or chair, these tea tables that the Swedish tend to like to use come up higher. I tried this in my own living room after being inspired by this. I just dragged a table I had that was, you know, standard table height, over to my love seat just kind of like this here, and it is awesome, especially if you’re serving food. It’s easier than the coffee table actually and I really like how it looks because it looks a little different.
Bleached blonde wood floors. So very light wood. Paint it light or bleach it, or just get it finished in a light light stain or get it pickled somehow.
But I think traditionally in these old houses they wouldn’t put anything on the floor, they just put the boards down and left them to weather. Now you can see here this has a light stain on it, or you know there are different ways to finish the floors in this blonde look, but that is a quintessential Swedish look, the blonde floors. I think this is Svindersvik, if I’m saying it right. You can see the silvery floors. This is Stromsholm, another palace in Sweden. You can see the floors aren’t finished at all. I don’t even know if they oil them, or if they’re just left the way they are but the boards turn silvery over time.
I think it might have started because they didn’t have the money for the plush rugs with pile and they would make these flat weave rugs and they would traditionally be a runner like you can see here in Carl Larsson’s home.
And then if they wanted it to move around the room they just folded it over, you can see there and in this picture over by the shoes it’s just folded and then it goes on its way horizontal, they want to go vertical they folded it, and on it goes.
For beds, a canopy bed or a four poster bed. Painted wood with some carving, that would be a great way to add some Swedish style into your home as well.
Okay, and then for the rest of your furniture, paint it. Look for furniture with little channels in it, like the Swedish cupboard carved and then with simple tapered legs.
So with channeled carving, or any other kind of carving, painted white or a light color and then tapered legs like you see that little blue night table, a little green, and this very simple bench with just this light greenish white color and simple tapered legs here. Again the settee, and there’s a little dresser in the corner with the little tapered legs and painted white. The channeled carving I’m talking about like on these chairs.
Swedish Style Dining Chairs, copyright Kathleen Monaghan
Crystal Chandeliers
Crystal chandeliers are a very Swedish look. Here’s an example of a few. You obviously – you know you can buy antique chandeliers for really relatively cheap if you get lucky. You can also just go to Lowe’s or Home Depot and they’ve got tons of really nice ones, but it’s a nice pretty way to add some Swedish Country Style to your house. And there’s another one.
You could paint or stencil your walls. Obviously Carl and Karin Larsson were artists and they probably, you know, they had all the skill, they used these beautiful paintings and swags and flowers on the walls.
Painted faux paneling, you can see here they’ve, at Carol Glasser’s home she’s just painted the wall in dark gray and a lighter gray and it looks like paneling.
And then here’s another example, some other examples of more elaborate, probably painted on a canvas and then tacked up to the wall or something like that.
But stencils will give that Swedish look for sure.
Tile Stoves
And then just a couple bonus ones. If you could afford to get a tile stove. Obviously it’s very cold in Sweden and at a certain point in time this technology came in and what happens is the the fire in there heats up these tiles and the tiles turn around and heat up the room and it’s more efficient than an open fireplace and also very beautiful. You can see all these decorative tiles so if you can get something like that somehow sourced for your house. Carol Glasser seems to have one in her house. I don’t know what her source is, maybe I’ll do another video on that in the future.
And then last but not least, the Mora Clock. I think if you are around Swedish Country Style at all, you’ve seen these clocks. Again, you can get reproductions pretty easily. You can also get the real antiques pretty easily – relatively easily. They’re kind of expensive. But a great beautiful shape there, and quintessentially Swedish.
Thank you so much for watching my video about 13 elements of Swedish Country Style. If you liked this video, would you mind giving me a thumbs up below? I’m so excited to keep making more videos about Swedish Country Style, French Country Style, and English Country Style and I am at oldworldfarmhouse.com. Thank you so much!
My son and I were inspired to paint this “Paris café” bed to be like these beautiful chairs and tables at this Paris café. Enjoy the video. If you prefer to read, the transcript follows below.
Transcript
I call this the Paris café bed because I got the idea for the colors from this beautiful picture of a café – outdoor café somewhere in Paris.
This was a bed frame that we got for free and my son saw it and he said, “I want that bed:” because he’s on the top bunk and he’s tired of being on the top bunk. So I said, well okay, why don’t we paint it? because it was pretty ugly and he loves red.
So he said he wanted to paint it red and I had some odds and ends left over of red paint, so we just got that out.
Now if you don’t want to get a headache running around after all those paints and you just want to go to Sherwin-Williams, I color matched them to I would say Sherwin-Williams Gladiola for the orangey red and Sherwin-Williams Antique Red for that darker red trim. And then of course the Valspar Brilliant Metals Aged Brass stays the same.
If you wanted to do this with Annie Sloan paint I would say Emperor’s Silk would be great for the brighter main red and then Primer Red for that darker red trim would be what I would recommend. So here it is, the Paris café bed. And my son, who’s something of a Francophile, is loving it.
If you like this video, please consider giving me a thumbs up down below. Thank you so much for watching. I can’t wait to make more videos about French, Swedish, and English country styles. Bye.
I compare and contrast two traditional khaki green paint colors: Annie Sloan Chalk Paint Olive and Sherwin-Williams Cocoon. They are both perfect for a French Country or Paris Country Style look on your painted furniture. They will give you amazing results. They are both my new favorite neutral to complement almost any other furniture and decor. I hope this video helps you find your go-to neutral paint. If you prefer reading, I’ve posted the transcript of the video below.
Transcript
Two Traditional Khaki Green Paint Colors
Hey! This is Kathleen from oldworldfarmhouse.com and today I wanted to talk about two beautiful khaki paint colors, Annie Sloan Chalk Paint Olive, Sherwin-Williams Cocoon. They are both great for indoor furniture.
All right, well, it’s obvious from my two chairs, the one on the left I painted in Olive by Annie Sloan and the one on the right in Cocoon by Sherwin-Williams. And the paint chip card, on the color card these colors look identical. You can see that they’re not.
Which color is best?
I think these are both gorgeous shades of khaki. This is my chair that I wanted to cover all over in a little wash of olive and then ran out of the paint because I unexpectedly loved it and started painting lots of things with it. So I went and got some Sherwin-Williams Cocoon. according to my eyes on the color chips and sample cards, looks exactly the same as Annie Sloan Olive, but then as we saw on my chairs, hmm, pretty different.
Olive is greener, Cocoon is browner
My chairs are a more accurate colour sample than the color cards. The Olive seems a lot greener. So I’m going to cover up this patch that I couldn’t before with my brush and we’re just gonna see if it blends in with the Annie Sloan Olive. My Cocoon color has dried and let’s see if I can tell a difference from where I have painted olive.
I just think both colors are wonderful. I do think they could interchange for each other, even though, as you can see, they are really not an exact color match. But they are very close.
This is my favorite, favorite neutral for painting furniture. Either olive by Annie Sloan or cocoon by Sherwin-Williams. Both paint colors give amazing results.
I used to love Chateau Grey by Annie Sloan the best.
But that was before she came out with her Olive. Olive is kind of a newer color for her. I think it’s just a little more serious than Chateau Grey it’s got a little bit more brown in it, but in a good way. It really does look like pale olive leaves. Sherwin-Williams Cocoon really does look like a cocoon. The color names do a great job of describing the subtle difference in the two colors. Olive is slightly greener, and Cocoon is slightly browner.
So much complexity and depth
I was very skeptical before I bought my sample pot. I was like, I don’t know why I’m wasting my money on this color, it’s just not going to be very exciting, but it’s one of those colors that’s not so exciting on the chip, or even in the can, but when you get it on you’re like, oh my gosh, I love that color it’s just so interesting and complex. It’s a great neutral because it’ll bring out the prettiness of the browns in the room it’ll also look fabulous with any red. It just it plays well with so many different colors and it really gives that classic French painted furniture look.
Classic, traditional, and very French
It is a traditional green decorative paint color for furniture. It will give your old furniture a traditional green painted furniture style. So Annie Sloan Olive or Sherwin-Williams Cocoon. A French Provincial or like a Paris Provincial or Paris Country, French Country look.
Green is the perfect color for a home library. It is cozy, soothing, and classic. I made a video about the color palette we developed for our home library. We wanted an English country house feel. A masculine room – an elegant man cave. I hope it helps you choose the best green for your room.
If you prefer to read, the transcript follows the video.
Transcript
Hey this is Kathleen from oldworldfarmhouse.com and today I wanted to talk to you about a great color palette if you’re looking for a cozy green palette to do a home office or study or library.
I actually took these colors from a color match from Farrow and Ball colors because since I was going for an English library look I wanted to look at English paint. Farrow and Ball Breakfast Room Green for the walls, Farrow and Ball Studio Green for the trim, Farrow and Ball String, and there’s no metallic paint for Farrow and Ball so I don’t have a match for that.
Our Green LibraryOur Home Library
I think green for a library or home office is awesome if you want that English country look. If you look at pictures of English country libraries, they’re not all green, but a lot of them are.
The English seem to love green and then too I think that if you get the dark green trim and the bright green walls, it can really evoke the English countryside, or your countryside, where there’s so many different shades of green from light to medium to dark outside and bring that in and it’s such a cozy feel.
So these are just great colors for our study, we’ve got Ivoire Sherwin-Williams on the ceiling, and then brass metallic paint by Valspar on that crown molding, Rookwood Shutter green, Lounge Green on the walls.
Our Home Library
I love English country style. If you love these topics too and you have a passion for them, please check out my blog oldworldfarmhouse.com. Thank you so much for watching.
Check out the video for the full tutorial. If you prefer, a transcript of the video follows below. I have also included a supply list with links to make it easy to find everything.
I usually think of Paris as a warm gray but I love the idea of it being a patinated oxide oxidized copper um like some of the roofs or the metro sign or the fancy fountains in Paris and the name of the paint actually gave me the whole inspiration for the project and I love the idea.
Hey this is Kathleen from oldworldfarmhouse.com and today I am cleaning off some furniture that I got off Facebook Marketplace. So I’m mixing four tablespoons into two gallons of warm water. I got these two dressers and nightstand and a bed facebook marketplace for free and they are – they need – they got a really rough paint job with a lot of drips that need to be sanded off and they also kind of smell like maybe mouse pee. So the first step is just for me to take my Dirtex solution, it’s this pale yellow, the more Dirrtex you put in the darker it gets. This is the concentration, four tablespoons to two gallons of water, for furniture. I think it should be fine and I’m just going to wipe it down, all over inside and out. What this stuff is on here, something really gross, yes definitely some kind of animal pee, but the Dirtex should take care of it. Um, Dirtex is a little different from TSP and that they say explicitly on the box you do not have to rinse, whereas with TSP you’re always having to do a rinse. But um, I might go over this twice, because it’s pretty gross. Okay, while I’m out here I’m also going to take off all the hardware with a screwdriver.
Okay, so now we are standing the rough paint. There’s a very rough paint job with lots of marks right here with 60 grit paper. Okay we finally got these pieces cleaned up and we are ready to start painting. We are using Sherwin-Williams Parisian Patina and I’m probably going to do some accents in Lounge Green.
I’ve got one of my favorite helpers here, my daughter stirring the paint, and I’m just testing out from the lid with my Purdy trim brush, which is pretty much my favorite thing to paint with, and we’re gonna just get started painting upside down. I have painted this whole piece in Parisian Patina and now I am adding highlights with Lounge Green to give it that look like copper gets on a building where it’s oxidized all over green, and then in some areas it’s, you know, just a little greener like where it sticks out, like it’s elbows or something. So I have the – the barest minimum amount of paint on this brush like it’s – it’s so dry that I couldn’t possibly get it any drier and here’s my ridge and I’m just gonna – just the – the tiniest suggestion of more oxidation on the corners, even though I realize it’s obviously wood, so it’s ridiculous, the wood wouldn’t be oxidized, but the overall effect will be – will be cool, you’ll see. So yeah, it’s the teeniest bit of dry brushing, brush, brush.
Let’s see here I had to load up my brush again, and it wasn’t quite as optimally dry so I’ll probably just go and touch that up with my other brush to cover it maybe when it’s dry.
I really don’t want anything but the barest hint.
Today I am going to be waxing my pieces with Minwax Paste Finishing Wax in Natural. Waxwell brush, trusty brush, and I’m just rubbing this on. I – the paints I chose were very, uh, one of them is called Flat that’s the Captivate Parisian Patina in their Captivate which is their kind of, their budget paint line, and I got that in a flat, and then Lounge Green, which is this lighter green color here, is in the Emerald Matte paint so it’s very matte, and i think that rubbing it with the wax is going to give it a nice, that nice, you know, hand rubbed look. So again I’m just pressing and pushing it into the paint. I want to do a very, very thin layer. The Minwax furniture wax, um, is a good budget alternative to the Annie Sloan clear wax. It might have a slight more bit of yellow to it but I don’t really care about that. I’ve never really, I don’t think it’s noticeable and it’s ten dollars for one pound versus I can’t remember how much you get in a tin of Annie Sloan, um, slightly less and it’s – it’s slightly more, so it’s a very good product. But uh, I am just as, you know, I – I love going into Sherwin-Williams and being able to pick out any color and getting that kind of inspiration and knowing that I’m paying so much less. I don’t have to wait for it to come in the mail because I don’t have a stockist near me for Annie Sloan, sadly. Um, so yeah that’s what we’re doing, and then here’s the top. My little girl was helping me and she has run off. So you can see there how it – it is slightly yellow but when you rub it on. I – this will be the final step. I think that I will only wax these pieces once. They’re not going to be getting a lot of hard wear. If I was being very responsible I might wax the top twice because we might set – inevitably set glasses and things like that on there. And I am waxing over these handles. I copper leafed them and I am waxing over them to seal them. That way the copper leaf is not going to patinate as it ages. It’s going to stay bright.
And today I’m going to show you how to copper leaf drawer handles. I am going to copper leaf all of these metal drawer handles for my new french dressers and the first step is to paint all of them with size. Now this one I got on Amazon. Speedball Metal Leaf. I have used this so far on eight or nine handles and four clawfoot tub feet in my bathtub, and I still have quite a bit left. I just got a little whatever cheapo brush. You dip it in your size and then you paint all over and it looks kind of white. Some of these are half done already because I was leafing them and I ran out of copper leaf so now I’m going back. But it looks white. It’s kind of hard to see, because these handles are white, but when you paint it on, it’ll look white and then you go away and you wait 30 minutes or 45 minutes or so until it is completely clear and when you come back and it’s clear, it will feel sticky and that’s the point when you start to attach your leaf. This is copper leaf. You can do gold, brass, silver, there’s all different colors. It has dried nice and clear and it’s time to put on the copper leaf. I bought this from Amazon. It was, I think, eight bucks. Um, it’s, they come in all different price points and all different, uh numbers. This is one of the smaller uh, sets of leaf, and it comes like this. There’s a leaf and then there’s a piece of tissue paper in between each each leaf like that so what you do is you just, and you place it, whatever it is you’re leafing, wanting to leaf. And then you take a brush, you can buy a special brush, you know, made for copper leafing, that’s what this is. It’s kind of nice because they’re soft and that’s what they’re meant for, but if you just want to use like a little kids paintbrush or anything that’s soft yes, like, oh, my daughter’s right here off screen. This is just like a Crayola crayon brush. This would work fine because all you’re gonna do with it is just push gently you just you’re pushing it on to the size and the excess leaf, you know, you just kind of brush away, you brush it off. It comes off,
And then you have your, and this is a little part I missed, so I’m going to, I’m going to take this little bit and lay it on there and just again take my brush and push and then whatever isn’t directly stuck to some size it just comes – it comes right off and you can brush it away and use it on another, uh thing or you know if it’s too small, discard.
And here is the finished product. I did two dressers exactly the same way with the Parisian Patina and Lounge Green highlights and the copper leafed handles, and one nightstand and I’m painting the bed a totally different color for my son. So I’m very pleased with how this turned out and I think it does have a Parisian patina.
After that initial coat, a great way to add dimension and interest to painted furniture is to subtly layer another color or two on top. But please, no sanding! It’s too much work. In this YouTube video, linked right below here, I’ll show you how to get that layered look, no sanding necessary.
If you don’t want to watch the video, the transcript follows right here below.
Transcript
Hey this is Kathleen from the blog oldworldfarmhouse.com and we’re back with our Gustavian Swedish style table. So I have covered the whole thing in one coat of Annie Sloan chalk paint in Duck Egg Blue and now I’m going to go back over and dry brush in some highlights.
Using a paper plate as a palette
So I like to put my paint on a plate when I’m brushing on the highlights or if I want to mix colors. I’m going to brush on some highlights of Paris Grey into this Duck Egg Blue. And I’m going to do that for a couple reasons.
One is, one coat – come over here and I’ll show you – one coat doesn’t fully – fully cover. You can still use brush marks still where you could touch up, and instead of going over that again with another coat of Duck Egg Blue I’m going to take this opportunity and touch up or brush on highlights in Paris Grey to give it some more interest. But I also have a little Duck Egg Blue on my plate, and obviously my brush is full of Duck Egg Blue paint.
Dry brushing highlights and lowlights
And I’m – I’m just gonna blend them together on the plate and then kind of touch up my piece. and I am just, doing this um, just by instinct and just kind of what I want as far as what I would imagine I want it to be, a little shadowy or have a little highlight.
I learned this technique from this wonderful blogger who sadly doesn’t blog anymore, Leslie Stocker, um she still keeps her blog up though, I believe, and she taught me this.
Sanding technique for highlights and lowlights
Instead of – Annie Sloan recommends painting in two colors and then sanding back so that you see, um, the base color underneath the top coat and then maybe some of the wood if you like, as well, but the sanding is – is very time consuming and then of course you end up wasting your paint and then you sand the paint off and it’s kind of frustrating especially because her paint’s kind of expensive.
Leslie Stocker, her method is just to dry brush on highlights and just avoid sanding all together and I love that because it saves me time, saves me money, and I – I do think the effect is pretty much the same, having done both I – I really think the effect is the same. So I just wanted, I want to kind of highlight these rosettes because they’re interesting and then back here I missed some spots so the brown is poking through so I’m just gonna stipple with my brush, get some gray in there and I’m just gonna go around the whole piece with my plate and just use it as a palette and get some green in with the gray. So I don’t want it to be, you know, really blaringly obvious, “hey hey here’s a highlight!” But just, you know, just a little bit of subtle variation and change and that’s what I’m going to do around the whole piece.